Screw Piles vs Sonotubes: Ontario Deck Footing Guide
Updated October 20, 2026
Direct answer. Screw piles and sonotubes both meet Ontario code for deck footings. The real difference is the approval path: a sonotube follows the Part 9 depth tables, while a screw pile must be designed under Part 4 by a qualified professional who seals a certificate for your project.
TL;DR
Screw piles install in hours and work year-round, including frozen ground, with no curing wait before framing [3]
Sonotubes need a hole to 1.2 m or more, a form, a pour, and a wait, and the hole can sit open pending inspection [12][14]
A CCMC evaluation is not project approval. Every screw pile job needs a qualified professional to design it under Part 4 and seal a certificate [4][12]
Ontario dropped the Minister's Ruling step for CCMC-evaluated products on July 1, 2025, so the engineer's certificate is the live gate [11]
Small, low, freestanding, roofless decks are exempt from frost depth entirely, and that exemption is narrower than most guides state [12]
Concrete still wins on shallow bedrock, on DIY builds, and where Part 9 drawings are simpler [12][15]
Neither method has a fixed price. The quote tracks pile count, soil, depth, access, and engineering
One liner: For most Hamilton decks screw piles are faster and more weather-proof, but the decision that passes inspection is who engineers and certifies the footing.
Screw piles vs sonotubes at a glance
In short: screw piles are steel and immediate. Sonotubes are concrete and need curing time. Both carry a deck when engineered and installed correctly.
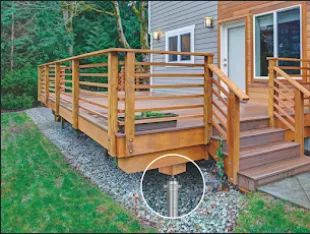
Every deck sits on a choice you stop seeing once the boards go down. For most Ontario homeowners, that choice is screw piles vs sonotubes: steel posts turned into the ground, or concrete poured into a cardboard tube [1].
Picture two builds. One takes a weekend of digging holes below the frost line, then a wait while the concrete cures. The other ends with a crew packing up after a few hours [3]. Both can carry a deck through a Hamilton winter when they're done right. The gaps show up in time, weather, yard damage, and sign-off.
You'll also see screw piles called helical piles. It's the same product: a steel shaft with a helical plate near the tip.
Screw piles vs sonotubes compared
Factor | Screw piles | Sonotubes |
|---|---|---|
What it is | Galvanized steel shaft with a helical plate [2] | Cardboard tube form filled with poured concrete [1] |
How it goes in | Turned into the soil until it reaches a set torque and depth [1] | Hole dug, form set, concrete poured |
Frost | Installed below the frost line [3] | Hole dug below frost depth before the pour |
Install time | Many residential jobs take 2 to 6 hours [3] | Digging and pouring, then curing time |
Weather | Year-round, including frozen ground [3] | Open to the seasonal delays common with concrete [3] |
Building on it | Right away, with no curing wait [3] | Only after the concrete cures |
Yard impact | Compact equipment, little digging [3] | Every hole dug out to full depth |
Who signs off | A registered professional engineer sizes the piles and certifies each project [4] | Footing size, depth, and concrete strength shown on the permit drawings [5] |
That last row is the one most comparisons skip. It's also where screw pile jobs either pass inspection or stall, so it comes next.
What CCMC approval actually covers
In short: a CCMC report is a product opinion, not project approval. An engineer sizes the piles and certifies the job to the building department.
A CCMC evaluation doesn't approve your deck. It's an expert opinion on a product, and every screw pile project still needs a registered professional engineer to size it and sign off [4].
That catches many homeowners off guard. The Canadian Construction Materials Centre, part of the National Research Council of Canada, says its reports give an opinion on code compliance, while final approval rests with the authority having jurisdiction [6]. For a Hamilton deck, that's the City's building division. And no jurisdiction is bound to accept a CCMC report [7].
Picture two finished decks on the same brand of pile. The first has a receipt and a product number. The second has a sealed engineer's certificate ready when the inspector asks for it. Only the second is set up to pass.
What every screw pile project needs
The CCMC lists conditions that apply to every auger-installed steel pile project [4].
Requirement | What it means for your deck |
|---|---|
Helical blades | The helical plate is part of the evaluated design, not an add-on |
Engineer approval | A registered professional engineer sets how many piles you need and how far apart they go |
Signed, sealed certificate | The engineer confirms the installation and allowable loads to the building department |
Standard welding | Welds meet CSA requirements and come from certified welders |
Corrosion protection | An engineer decides whether your soil is corrosive and what protection fits |
Certified installer | A trained crew installs the piles to the manufacturer's instructions [9] |
What torque readings prove
Installers track torque as each pile turns in. Postech's data sheets say on-site torque monitoring helps confirm bearing capacity, and that all loads must be validated by a licensed engineer [10]. So the torque log is evidence the engineer relies on, and it works alongside that sign-off.
Here's where screw piles vs concrete footings split on paper. A poured footing is checked against permit drawings for size, depth, and concrete strength [5]. A screw pile job adds the engineer's certificate to that file.
Where Postech piles stand
Postech's evaluation, CCMC 13102-R, is listed as active in the national registry and covers the P178, P238, and P312 piles [8]. Postech Hamilton used P312 piles on a timber frame covered deck in Binbrook [3]. Postech Hamilton helps choose the right pile system and coordinate the paperwork each project needs [3]. That keeps the engineering step inside the job, so it doesn't land on you the week before inspection.
One Ontario step did change recently. Until July 2025, a CCMC-evaluated product also needed a Minister's Ruling before it could be used here. Ontario removed that requirement on July 1, 2025 for products the CCMC has already evaluated [11]. The engineering did not go anywhere. Helical piles sit outside the prescriptive footing rules in Part 9 of the code, so they have to be designed by a qualified professional under Part 4 [12]. Less provincial paperwork, same engineer.
Approval covers who signs off. Depth is the other half of the code picture.
Frost line Ontario rules for deck footings
In short: non-floating deck foundations go 1.2 m below grade unless they bear on sound bedrock. Floating decks are exempt.
The frost line in Ontario isn't one number, but the rule that follows it is simple. A deck foundation that isn't floating and isn't sitting on sound bedrock has to reach at least 1.2 m below finished grade, measured to the underside of the footing [12].
If you can't get there, you can't stop short either. Alternative frost protection, such as insulation, has to be designed by a qualified professional [12].
When a deck is exempt from frost depth
Article 9.12.2.2 of the code sets out a floating deck. Meet every line below and the depth rule doesn't apply to your foundation [12].
Criterion | Limit |
|---|---|
Area | 55 square metres (592 sq ft) or less |
Storeys | 1 or less |
Roof | None, and a pergola counts as a roof |
Height to underside of joists | 600 mm (23 5/8 in) or less, or up to 1.2 m (47 1/4 in) where additional bracing is provided |
Attachment | Not attached to another structure, unless a qualified professional demonstrates that differential movement won't adversely affect performance |
Two conditions most guides leave out
The bracing allowance is the first. Plenty of Ontario deck guides quote the 600 mm figure as a hard ceiling. The code allows up to 1.2 m where the deck has additional bracing [12], which covers a lot of backyard builds that owners assume are disqualified.
The second is attachment. A deck attached to the house is usually described as automatically out. The wording is narrower than that. It's out unless a qualified professional can demonstrate that differential movement won't hurt the structure [12].
Both still need a professional's involvement. Neither is a loophole you can claim yourself on a permit drawing.
How each footing meets the rule
A sonotube meets it by depth. You dig to 1.2 m or better, place the form, and the footing bears below frost.
A screw pile meets it by engineered design. Because helical piles aren't a Part 9 prescriptive footing, the engineer sets the depth from soil and load rather than from a table [12]. Postech states its piles go in below the frost line [3], and the torque log records what the pile found on the way down.
Depth and approval are settled. Installation is where the two methods stop resembling each other.
How each footing is installed
In short: screw piles are turned in and torque-verified in hours. Sonotubes are dug, formed, inspected, poured, and cured.
Both methods end with a bearing point under your deck posts. Getting there looks completely different from the back door.
Screw pile installation, step by step
Site assessment. The installer looks at access, loads, site conditions, and the pile configuration the project calls for [3].
Engineered layout. A qualified professional sets pile count, spacing, and capacity, since helical piles fall under Part 4 rather than the Part 9 footing tables [4][12].
Positioning. Compact equipment moves to each marked location. Postech notes this keeps disruption low and the yard largely intact [3].
Turning the pile in. The shaft is driven by torsion until torque and depth meet the load specification [1].
Torque verification. Torque is monitored through the install, which is how bearing capacity gets confirmed on site. All applicable loads still have to be validated by a licensed engineer [10].
Documentation. A certified installer torques each pile to specification and leaves the site ready to build [3][4]. Each pile head is set to its required elevation in the same pass, so the framing crew starts from a level layout [3].
Build. No curing wait, so framing can start the same day [3].
Postech puts many residential installs at two to six hours, with the actual figure depending on access, soil conditions, pile count, and project requirements [3].
Sonotube installation, step by step
Layout and permit check. Footing size, depth, and concrete compressive strength appear on the permit drawings [5].
Excavation. Each hole is augered or dug past frost depth, which in Ontario means 1.2 m or more to the underside of the footing [12].
Form setting. The tube goes in, gets levelled, and gets braced so it holds position.
Reinforcement. Rebar and any post anchor or bracket go in per the drawings.
Inspection hold. An inspector can order that no part of the work be covered pending inspection, so the hole often waits [14].
Pour. Concrete goes in and the surrounding soil is backfilled and tamped.
Cure, then build. Framing waits on the concrete.
What the two timelines look like
The yard tells the story. Concrete footings leave a spoil pile beside every hole, equipment room to reach them, and a site that stays open through inspection and cure. Screw piles leave holes the width of the shaft.
Weather sits on one side of this only. Postech installs year-round, including in frozen ground, which is how screw piles vs sonotubes usually splits a fall or winter build [3].
Speed is visible. Cost is where it gets argued.
Cost drivers for screw piles vs concrete footings
In short: neither method has a list price. Count, soil, depth, access, and engineering set the number.
No honest article can quote you a price for either method, because neither is a product you buy off a shelf. The quote tracks your site, not the footing type.
Here is what actually moves the number on screw piles vs concrete footings.
Driver | Effect on screw piles | Effect on sonotubes |
|---|---|---|
Count | Engineer sets pile number and spacing from the loads [4] | Footing count and size come from the permit drawings [5] |
Soil | Blade size and shaft design follow soil bearing capacity [10] | Harder digging and unstable holes slow excavation |
Depth | Extension sections are added to reach the depth required [1] | Every hole goes to 1.2 m or more, so volume climbs [12] |
Access | Timing depends on access and pile count [3] | Equipment and concrete delivery need room to reach each hole |
Spoil | Little material comes out | Every hole produces soil to move, stockpile, or haul |
Engineering | A sealed certificate is required for the project [4] | Usually covered by standard permit drawings |
Labour | Hours, with no return trip to pour | Dig, form, pour, and backfill across more than one visit |
Season | Installs run year-round, including frozen ground [3] | Cold and wet weather affect the pour window |
Inspection | Torque documented as the pile goes in [3] | Work can sit open until an inspector clears it [14] |
The line item people miss
Screw piles carry an engineering and certification cost that a standard poured footing often does not. That is real, and any quote that hides it is hiding the step that gets you through inspection.
The practical question is whether it is a separate invoice or part of the job. Postech Hamilton identifies the pile system and coordinates the documentation a project needs [3], which folds that step into the install rather than leaving it as a task you chase down later.
A site visit is the only way to turn these drivers into a figure. That is also where the answer to the next question gets decided, because some yards genuinely suit concrete better.
Deck blocks vs sonotubes
In short: blocks are legal only inside the floating deck criteria. Most decks people want fall outside them.
A precast block on the grass costs a fraction of a poured footing and takes about a minute to place. Whether deck blocks vs sonotubes is even a real choice comes down to one thing: whether your deck qualifies as a floating deck [12].
Your deck | What the code allows |
|---|---|
Small, low, freestanding, no roof, within every floating deck criterion | Frost depth rules do not apply, so surface-bearing blocks are on the table [12] |
Over 55 square metres, or more than 1 storey | Frost depth applies, so blocks are out [12] |
Carrying a roof, including a pergola | Frost depth applies, so blocks are out [12] |
Joists higher than 600 mm, with no additional bracing | Frost depth applies, so blocks are out [12] |
Attached to the house | Frost depth applies, unless a qualified professional demonstrates that differential movement will not adversely affect performance [12] |
Cannot reach 1.2 m or sound bedrock | Alternative frost protection, designed by a qualified professional [12] |
Read down that table and the pattern is clear. The exemption is written narrowly, and most decks people actually want fall outside it. A walkout off a raised bungalow, a covered deck, anything bolted to the house: all of those need a foundation that deals with frost.
One more thing worth separating. Qualifying under the code is not the same as skipping a permit. Permit triggers are set municipally, and your building department decides what drawings it wants to see [5].
So the real comparison, for most Ontario backyards, is not blocks against anything. It is the two engineered options.
Are screw piles better than concrete?
In short: better for most Ontario decks. Concrete still wins on shallow bedrock, DIY builds, and simple prescriptive footings.
For most Ontario decks, screw piles are the better choice: they install in hours, work year-round, and carry torque verification at install. Concrete still wins on shallow bedrock, on small prescriptive decks, and on DIY builds, where a poured footing on standard drawings is simpler.
Where screw piles have the edge
The verification point is the one professionals care about. Postech states that every pile is "torque-verified at the time of install, giving objective proof of load capacity," while concrete "cannot be independently verified without third-party testing" [15].
That matters because a poured footing hides its own quality. Once the hole is backfilled, what you have is a drawing and a receipt. A pile leaves a torque record of what it found on the way down, and that record is what the engineer relies on when they seal the certificate [4][10].
Postech states that every pile is backed by a lifetime warranty [15]. That is a manufacturer's warranty on the product, so the terms, the exclusions, and whether it transfers to a future owner are worth asking your dealer to put in writing.
A poured footing has no manufacturer standing behind it. Whatever protection you get comes from your contractor's own workmanship terms, so ask for those in writing too.
Postech Hamilton's helical piles vs concrete guide compares speed, excavation, and foundation performance side by side.
When concrete is still the better call
Postech names the limits itself. Its published FAQ lists screw piles as "not suited for every soil profile (bedrock under shallow cover is a limit case)," requiring "a certified installer with the right equipment," and "harder to source for DIY" projects [15].
Read that as three practical cases.
Shallow bedrock is the clearest. A helix needs soil to bite into. Where rock sits close to the surface, a poured footing bearing directly on sound bedrock is the straightforward answer, and the code recognises bedrock bearing in place of the depth rule [12].
Doing it yourself is the second. You cannot install screw piles without a certified installer and their equipment [15]. A homeowner with a shovel and standard permit drawings can pour their own footings.
The third is paperwork weight. A prescriptive footing can often proceed on Part 9 drawings, while helical piles always route through Part 4 design by a qualified professional [12]. On a small, simple deck, that extra step can outweigh the time you save.
Soil also sets limits on lateral capacity. Postech's data sheets note lateral loads do not apply in liquefiable or loose soils, water, or peatlands [10].
None of that is a reason to avoid piles. It is the reason a site visit comes before a quote.
Choosing footings for a Hamilton deck
In short: match the footing to the deck type, the site access, and the season. A site visit settles the rest.
Put the pieces together and most decks sort themselves quickly.
Your situation | The footing that usually fits |
|---|---|
Small, low, freestanding, no roof, within every floating deck criterion | Surface-bearing blocks are permitted, and neither engineered option is required [12] |
Standard deck attached to the house | Frost depth applies, so piles or poured footings, with the attachment condition engineered [12] |
Covered deck or pergola | Frost depth applies regardless of size or height [12] |
Sloped lot | Piles, since extension sections let each one reach the depth its own location needs [1] |
Tight or restricted access | Piles, installed with compact equipment [3] |
Sagging deck, or an existing structure needing support | Piles installed as underpinning, using the same compact access equipment [3] |
Shallow bedrock | Poured footing bearing on sound bedrock [12][15] |
Winter or shoulder season build | Piles, which install year-round including in frozen ground [3] |
Building it yourself | Poured footings, since piles need a certified installer and their equipment [15] |
Hamilton adds its own wrinkles. Sloped lots near the escarpment, narrow side yards, and older properties all change how equipment reaches the back of a house, and that shapes the quote more than the product choice does.
Postech Hamilton covers Hamilton, Ancaster, Dundas, Stoney Creek, Binbrook, Mount Hope and the surrounding areas [3]. The team handles foundation-only work for homeowners and deck builders, as well as full deck construction, so the same crew can do the footings and leave the framing to you [3].
Existing structures are their own case. Postech Hamilton also does foundation underpinning, which puts piles under something already built [3].
If your deck falls outside the floating deck criteria, screw piles vs sonotubes stops being a general question and becomes a site question: what your soil does, how the equipment gets in, and what the engineer needs to see. A site visit settles all three. Postech Hamilton quotes are free, and you can reach the team through the contact page [3].
Screw piles and sonotubes, pros and cons
In short: piles buy speed, season and verification. Concrete buys a simpler paperwork route and direct bedrock bearing.
Screw piles | Sonotubes | |
|---|---|---|
Pros | Hours not days; year-round install including frozen ground; no curing wait; torque-verified capacity; compact equipment; little spoil [3][15] | Prescriptive Part 9 route on standard drawings; workable as a DIY build; direct bearing on sound bedrock [12][15] |
Cons | Requires a certified installer and equipment; Part 4 engineering and a sealed certificate; limited where bedrock sits under shallow cover [4][12][15] | Excavation and spoil at every hole; work can sit open pending inspection; curing delays framing; weather-sensitive pour [12][14] |
Key terms
In short: the words that decide which footing your deck needs, in plain language.
Term | What it means |
|---|---|
Screw pile | A galvanized steel shaft with a helical plate, turned into the ground to carry a structure. |
Helical pile | Another name for a screw pile; the same product. |
Helical plate | The spiral blade near the tip that pulls the pile down and carries the load. |
Sonotube | A cardboard or fibre tube used as a form for a poured concrete footing. |
Torque verification | Measuring turning resistance during install, used to confirm bearing capacity on site. |
Frost penetration depth | How far freezing reaches into the soil at a given location. |
Frost heave | Upward ground movement when soil moisture freezes and expands. |
Floating deck | A deck meeting all of the Article 9.12.2.2 criteria, exempt from foundation depth rules. |
Sound bedrock | Rock capable of bearing a footing, accepted in place of the depth rule. |
CCMC | Canadian Construction Materials Centre, the National Research Council body that evaluates construction products. |
Authority having jurisdiction | The body that gives final approval, which for a Hamilton deck is the City's building division. |
Part 4 design | Engineered structural design required where a foundation type is not covered by the Part 9 tables. |
Key numbers and dates
In short: the figures that actually govern an Ontario deck footing, with where each one comes from.
Figure | What it covers | Source and year |
|---|---|---|
1.2 m | Minimum foundation depth to underside of footing, non-floating deck | Ontario Building Code 2024, via municipal code guideline, 2025 [12] |
55 square metres | Maximum area for the floating deck exemption | Ontario Building Code 2024, Article 9.12.2.2 [12] |
600 mm | Maximum joist underside height for the exemption | Ontario Building Code 2024, Article 9.12.2.2 [12] |
1.2 m | Raised exemption ceiling where additional bracing is provided | Ontario Building Code 2024, Article 9.12.2.2 [12] |
July 1, 2025 | Date Ontario removed the Minister's Ruling requirement for CCMC-evaluated products | Government of Ontario, 2025 [11] |
January 1, 2025 | Date the 2024 Building Code came into force | Ministry of Municipal Affairs and Housing, 2024 [13] |
2 to 6 hours | Typical residential screw pile install | Postech Hamilton, 2026 [3] |
13102-R | Postech CCMC evaluation number, listed active | National Research Council of Canada registry, 2026 [8] |
P178, P238, P312 | Postech piles covered by that evaluation | National Research Council of Canada registry, 2026 [8] |
Reference: the product and the code
In short: the two things a building department will ask about, summarised.
Postech Screw Piles
Property | Value |
|---|---|
Manufacturer | Pieux Vistech, Postech Screw Piles Inc. |
CCMC evaluation | 13102-R, listed active [8] |
Piles covered | P178, P238, P312 [8] |
Evaluated to | National Building Code of Canada 2015 [9] |
Other listing | ICC-ES ESR-4735 [2] |
Verification method | On-site torque monitoring, engineer validates loads [10] |
Warranty | Lifetime, per the manufacturer [15] |
Hamilton dealer | Postech Hamilton, Grant and Kairi West [3] |
Service area | Hamilton, Ancaster, Dundas, Stoney Creek, Binbrook, Mount Hope [3] |
Ontario Building Code, Article 9.12.2.2
Property | Value |
|---|---|
Current edition | 2024 Building Code, O. Reg. 163/24 |
In force | January 1, 2025 [13] |
Subject | Minimum depth of foundations |
Depth rule | 1.2 m below finished grade to underside of footing, non-floating, not on bedrock [12] |
Exemption | Floating decks meeting all criteria [12] |
Helical piles | Not covered in Part 9, designed under Part 4 by a qualified professional [12] |
Screw piles and sonotubes: common questions
In short: the questions homeowners and deck builders ask most, answered from the code and the manufacturer's own documents.
Are helical piles and screw piles the same thing?
Yes. They are two names for one product: a galvanized steel shaft with a helical plate near the tip, turned into the ground until it reaches a set torque and depth. So helical piles vs sonotubes describes the same comparison in different words. [1][2]
Do screw piles need an engineer in Ontario?
Yes. Helical piles are not covered by the prescriptive footing rules in Part 9, so they must be designed by a qualified professional under Part 4. The engineer sets pile number and spacing, then provides the authority with a signed and sealed certificate for the project. [4][12]
Do I still need a Minister's Ruling for a CCMC product in Ontario?
No. Ontario removed that requirement on July 1, 2025 for products already evaluated by the Canadian Construction Materials Centre. The engineering has not changed. The certificate from a qualified professional is still what the building department relies on. [11][4]
How deep do deck footings have to go in Ontario?
A deck foundation that is not floating and is not bearing on sound bedrock needs a minimum of 1.2 m below finished grade, measured to the underside of the footing. Where that depth is not achievable, alternative frost protection must be designed by a qualified professional. [12]
Can I put a deck on blocks instead?
Only if the deck meets every floating deck criterion: 55 square metres or less, one storey or less, no roof, joist underside within 600 mm of grade or up to 1.2 m with additional bracing, and not attached to another structure unless a qualified professional demonstrates differential movement will not affect performance. [12]
Can screw piles be installed in winter?
Yes. Postech states that screw piles install year-round, including in frozen ground, which avoids the seasonal delays common with concrete. Because there is no curing wait, framing can start as soon as the piles are in. [3]
How long does a screw pile install take?
Postech puts many residential installations at two to six hours. The actual time depends on access, soil conditions, pile count, and project requirements, which is why a site visit comes before a firm schedule. [3]
Sources
ICC Evaluation Service, ESR-4735, Postech Screw Pile Foundation System
National Research Council of Canada, CCMC Technical Bulletin, Auger-Installed Steel Pile Foundations
National Research Council of Canada, Using evaluation reports
National Research Council of Canada, CCMC evaluation services
National Research Council of Canada, CCMC Registry of Product Assessments, record 13102-R
CCMC Evaluation Report 13102-R, Pieux Vissés Vistech and Postech Screw Piles, re-evaluated 2018
Postech Screw Piles, Screw Pile FAQ, Why are Postech screw piles better than concrete